MCP
Connect AI agents to your semantic layer via MCP.
Overview
After deploying with bon deploy, AI agents can query your semantic layer through the Model Context Protocol (MCP). Bonnard's MCP server provides tools for exploring your data model and running queries.
MCP is supported by Claude, ChatGPT, Cursor, Windsurf, VS Code, Gemini, and more.
MCP URL
https://mcp.bonnard.dev/mcpSetup
Claude Desktop
- Open Settings > Connectors
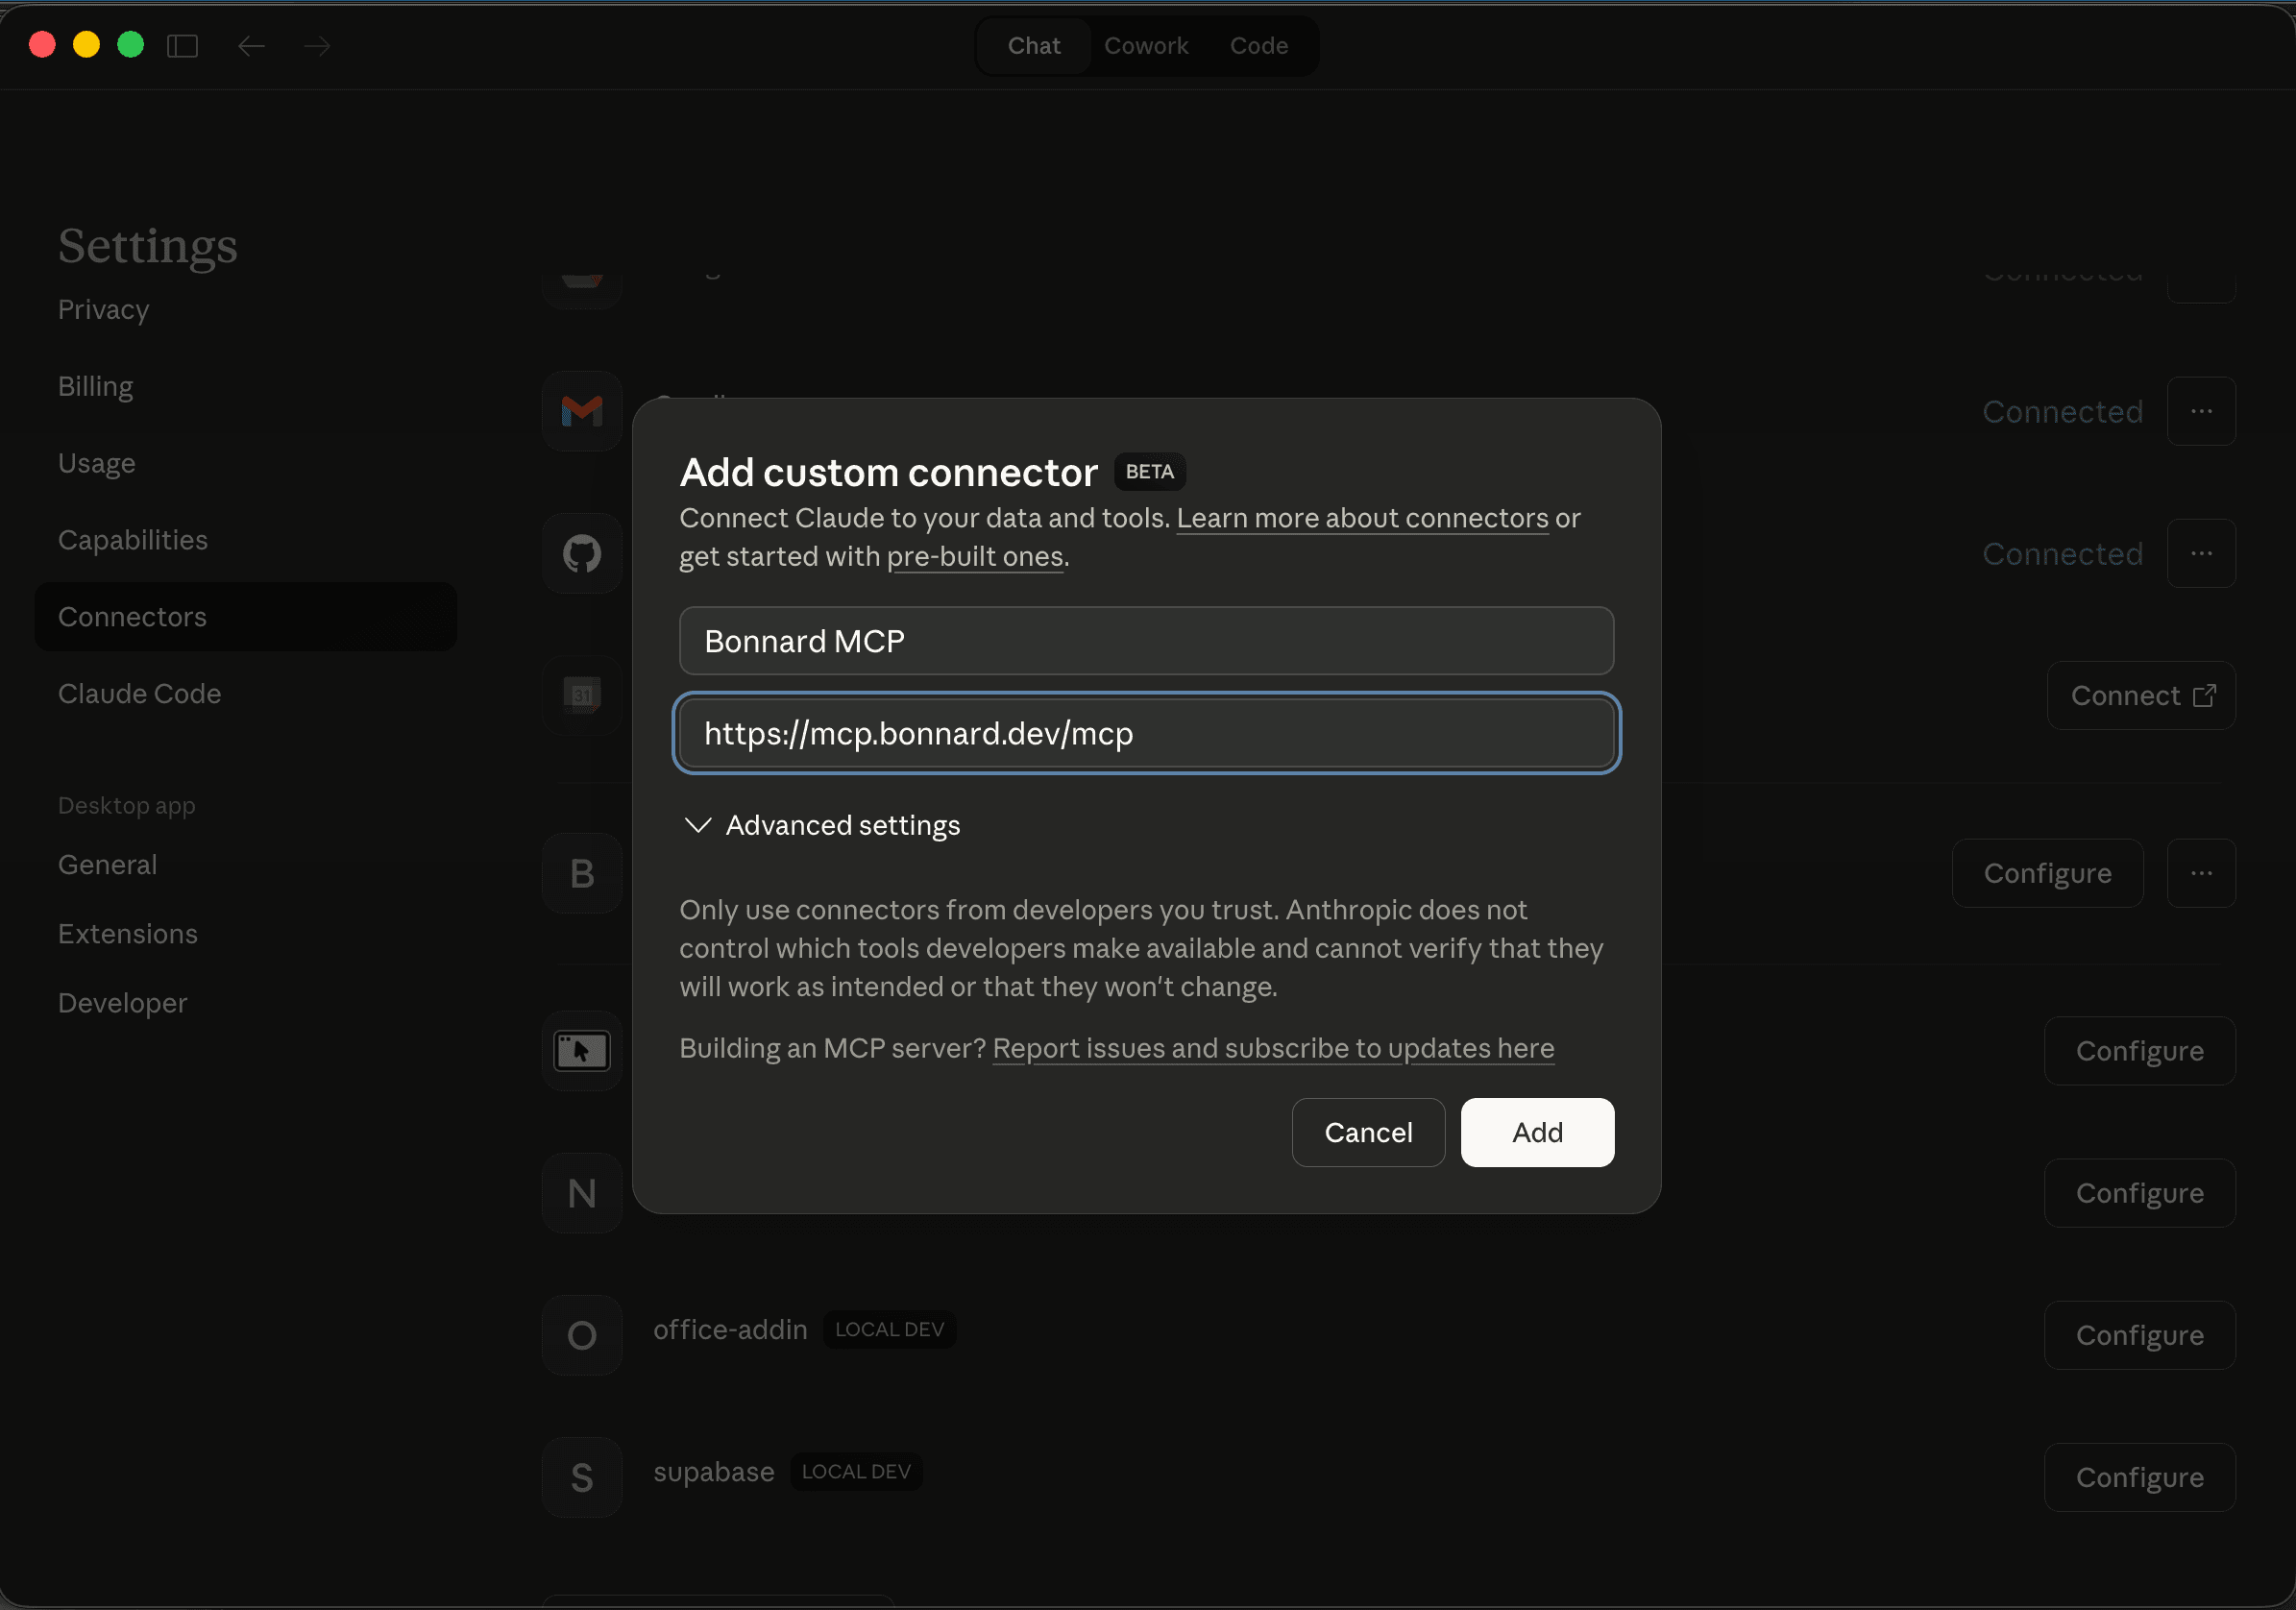
- Click Add custom connector
- Enter a name (e.g. "Bonnard MCP") and the MCP URL:
https://mcp.bonnard.dev/mcp - Click Add
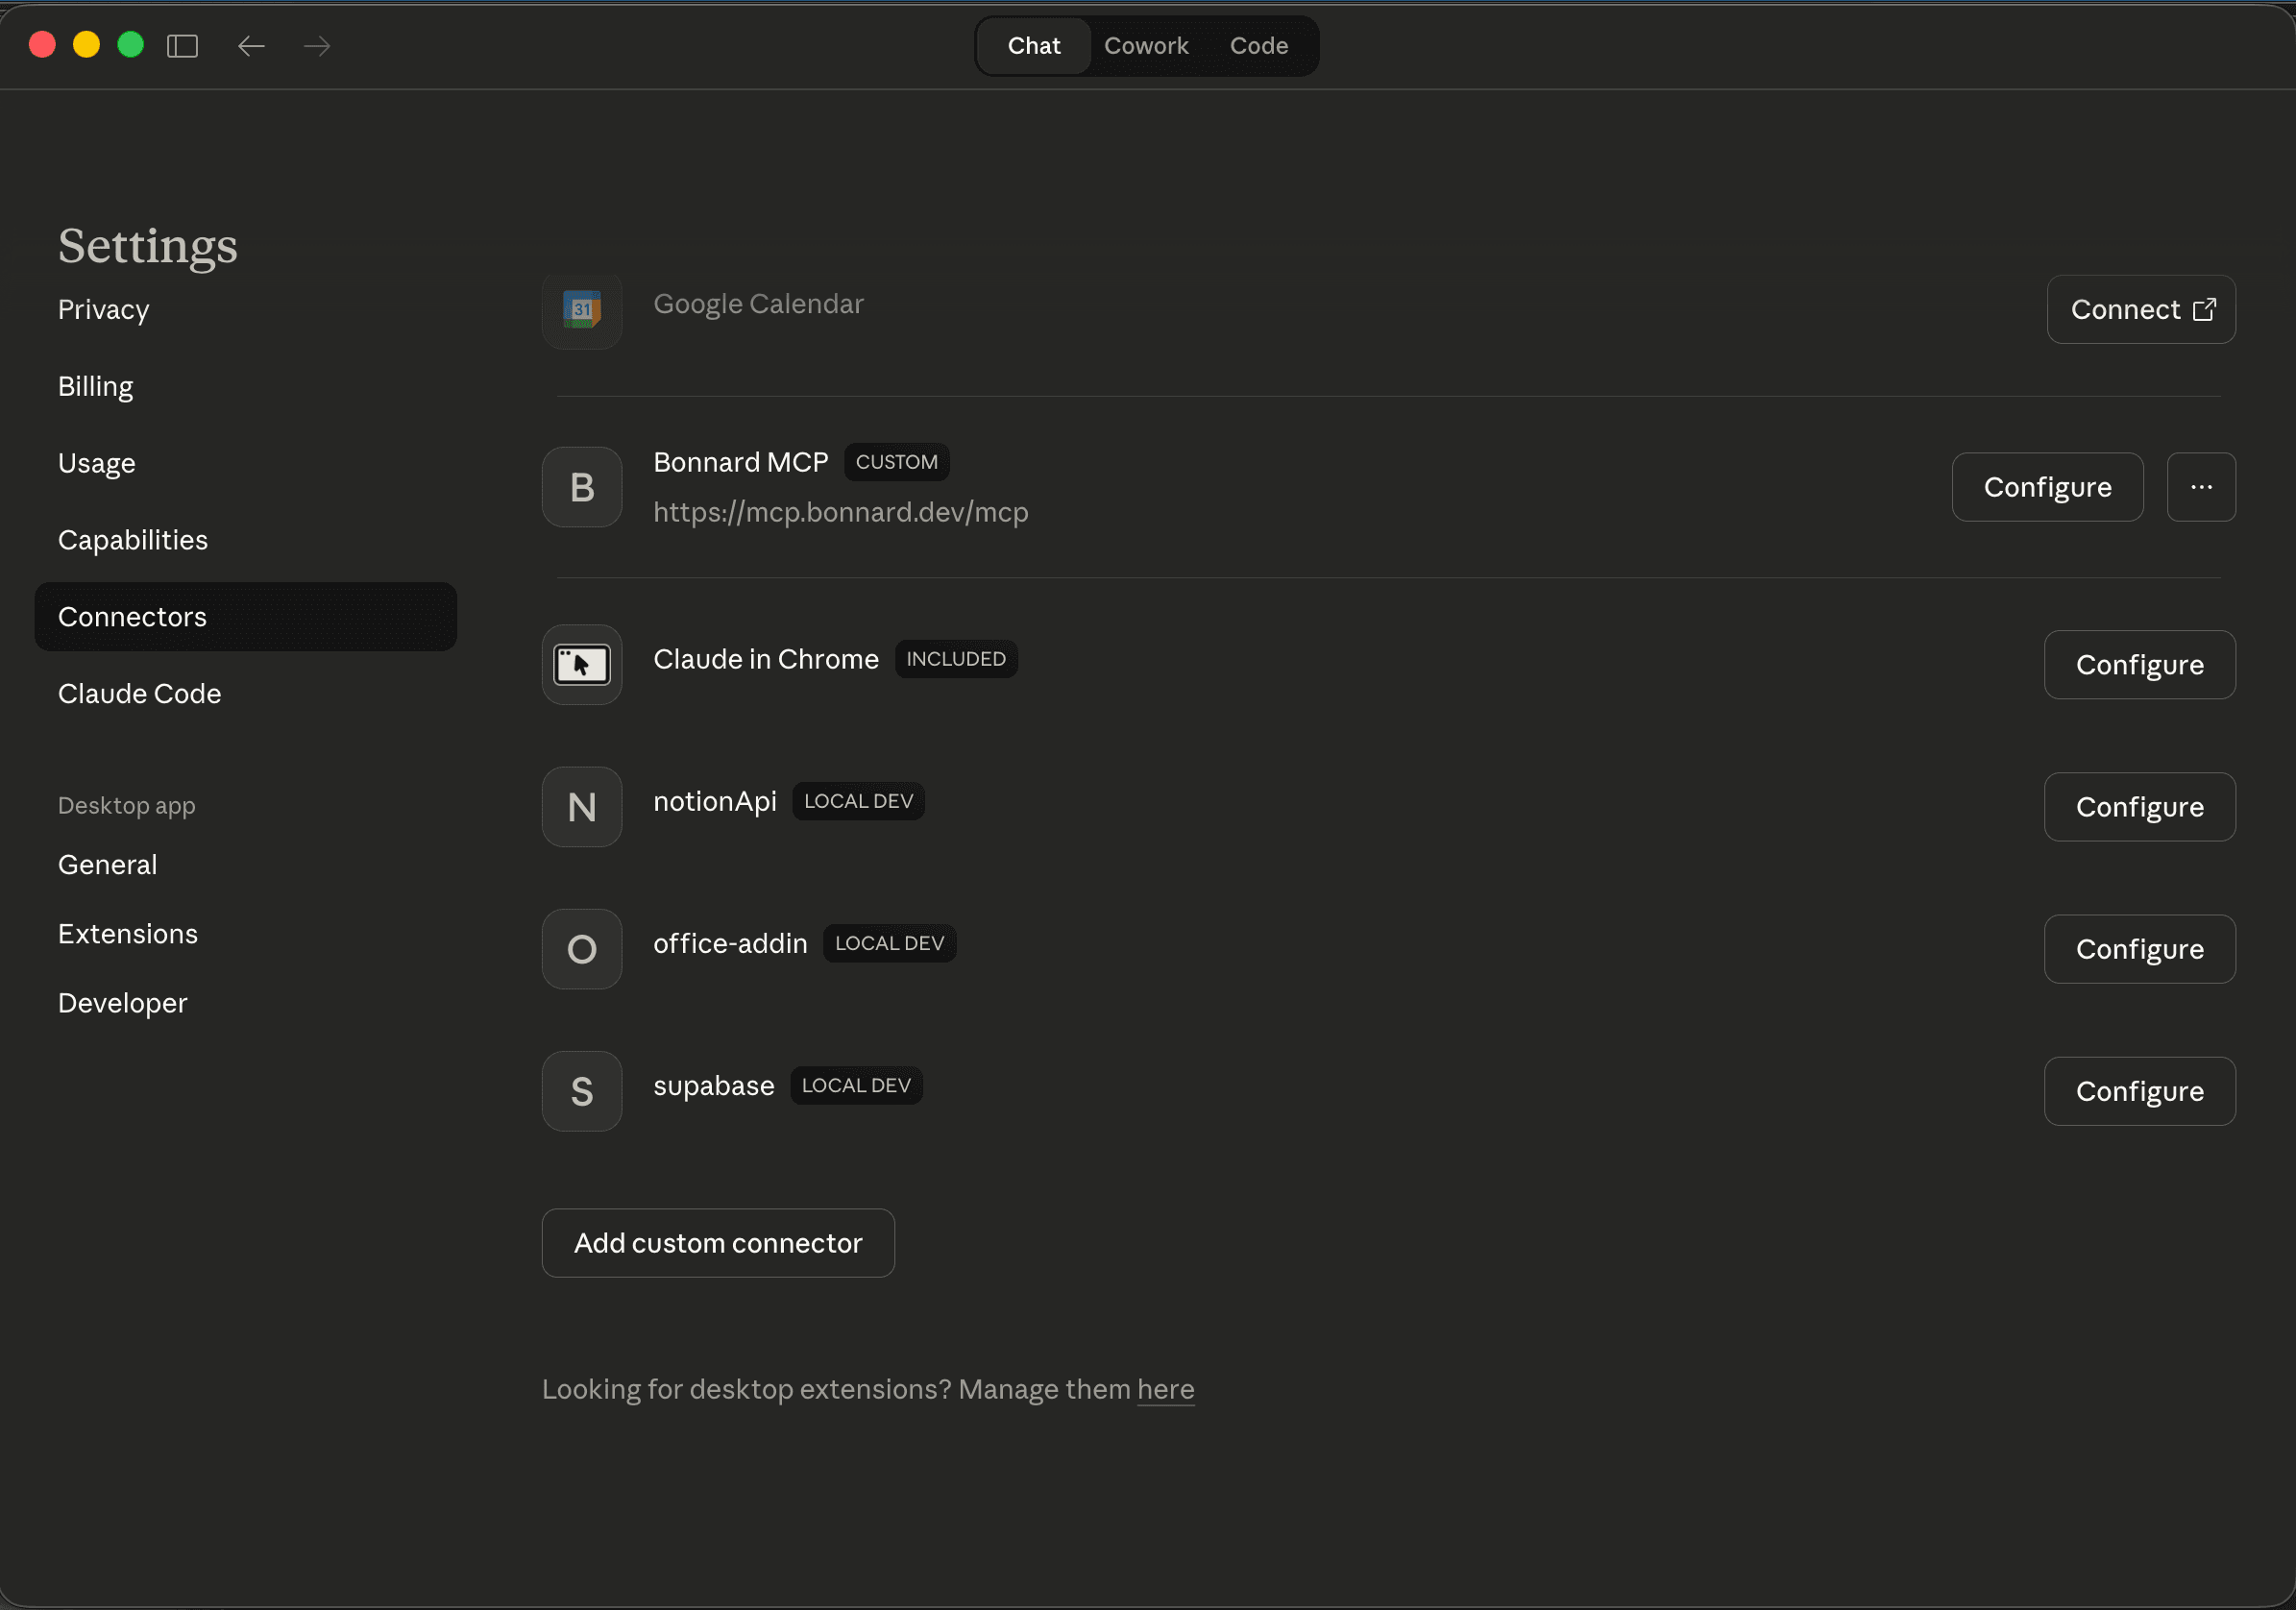
Once added, enable the Bonnard connector in any chat via the Connectors menu:
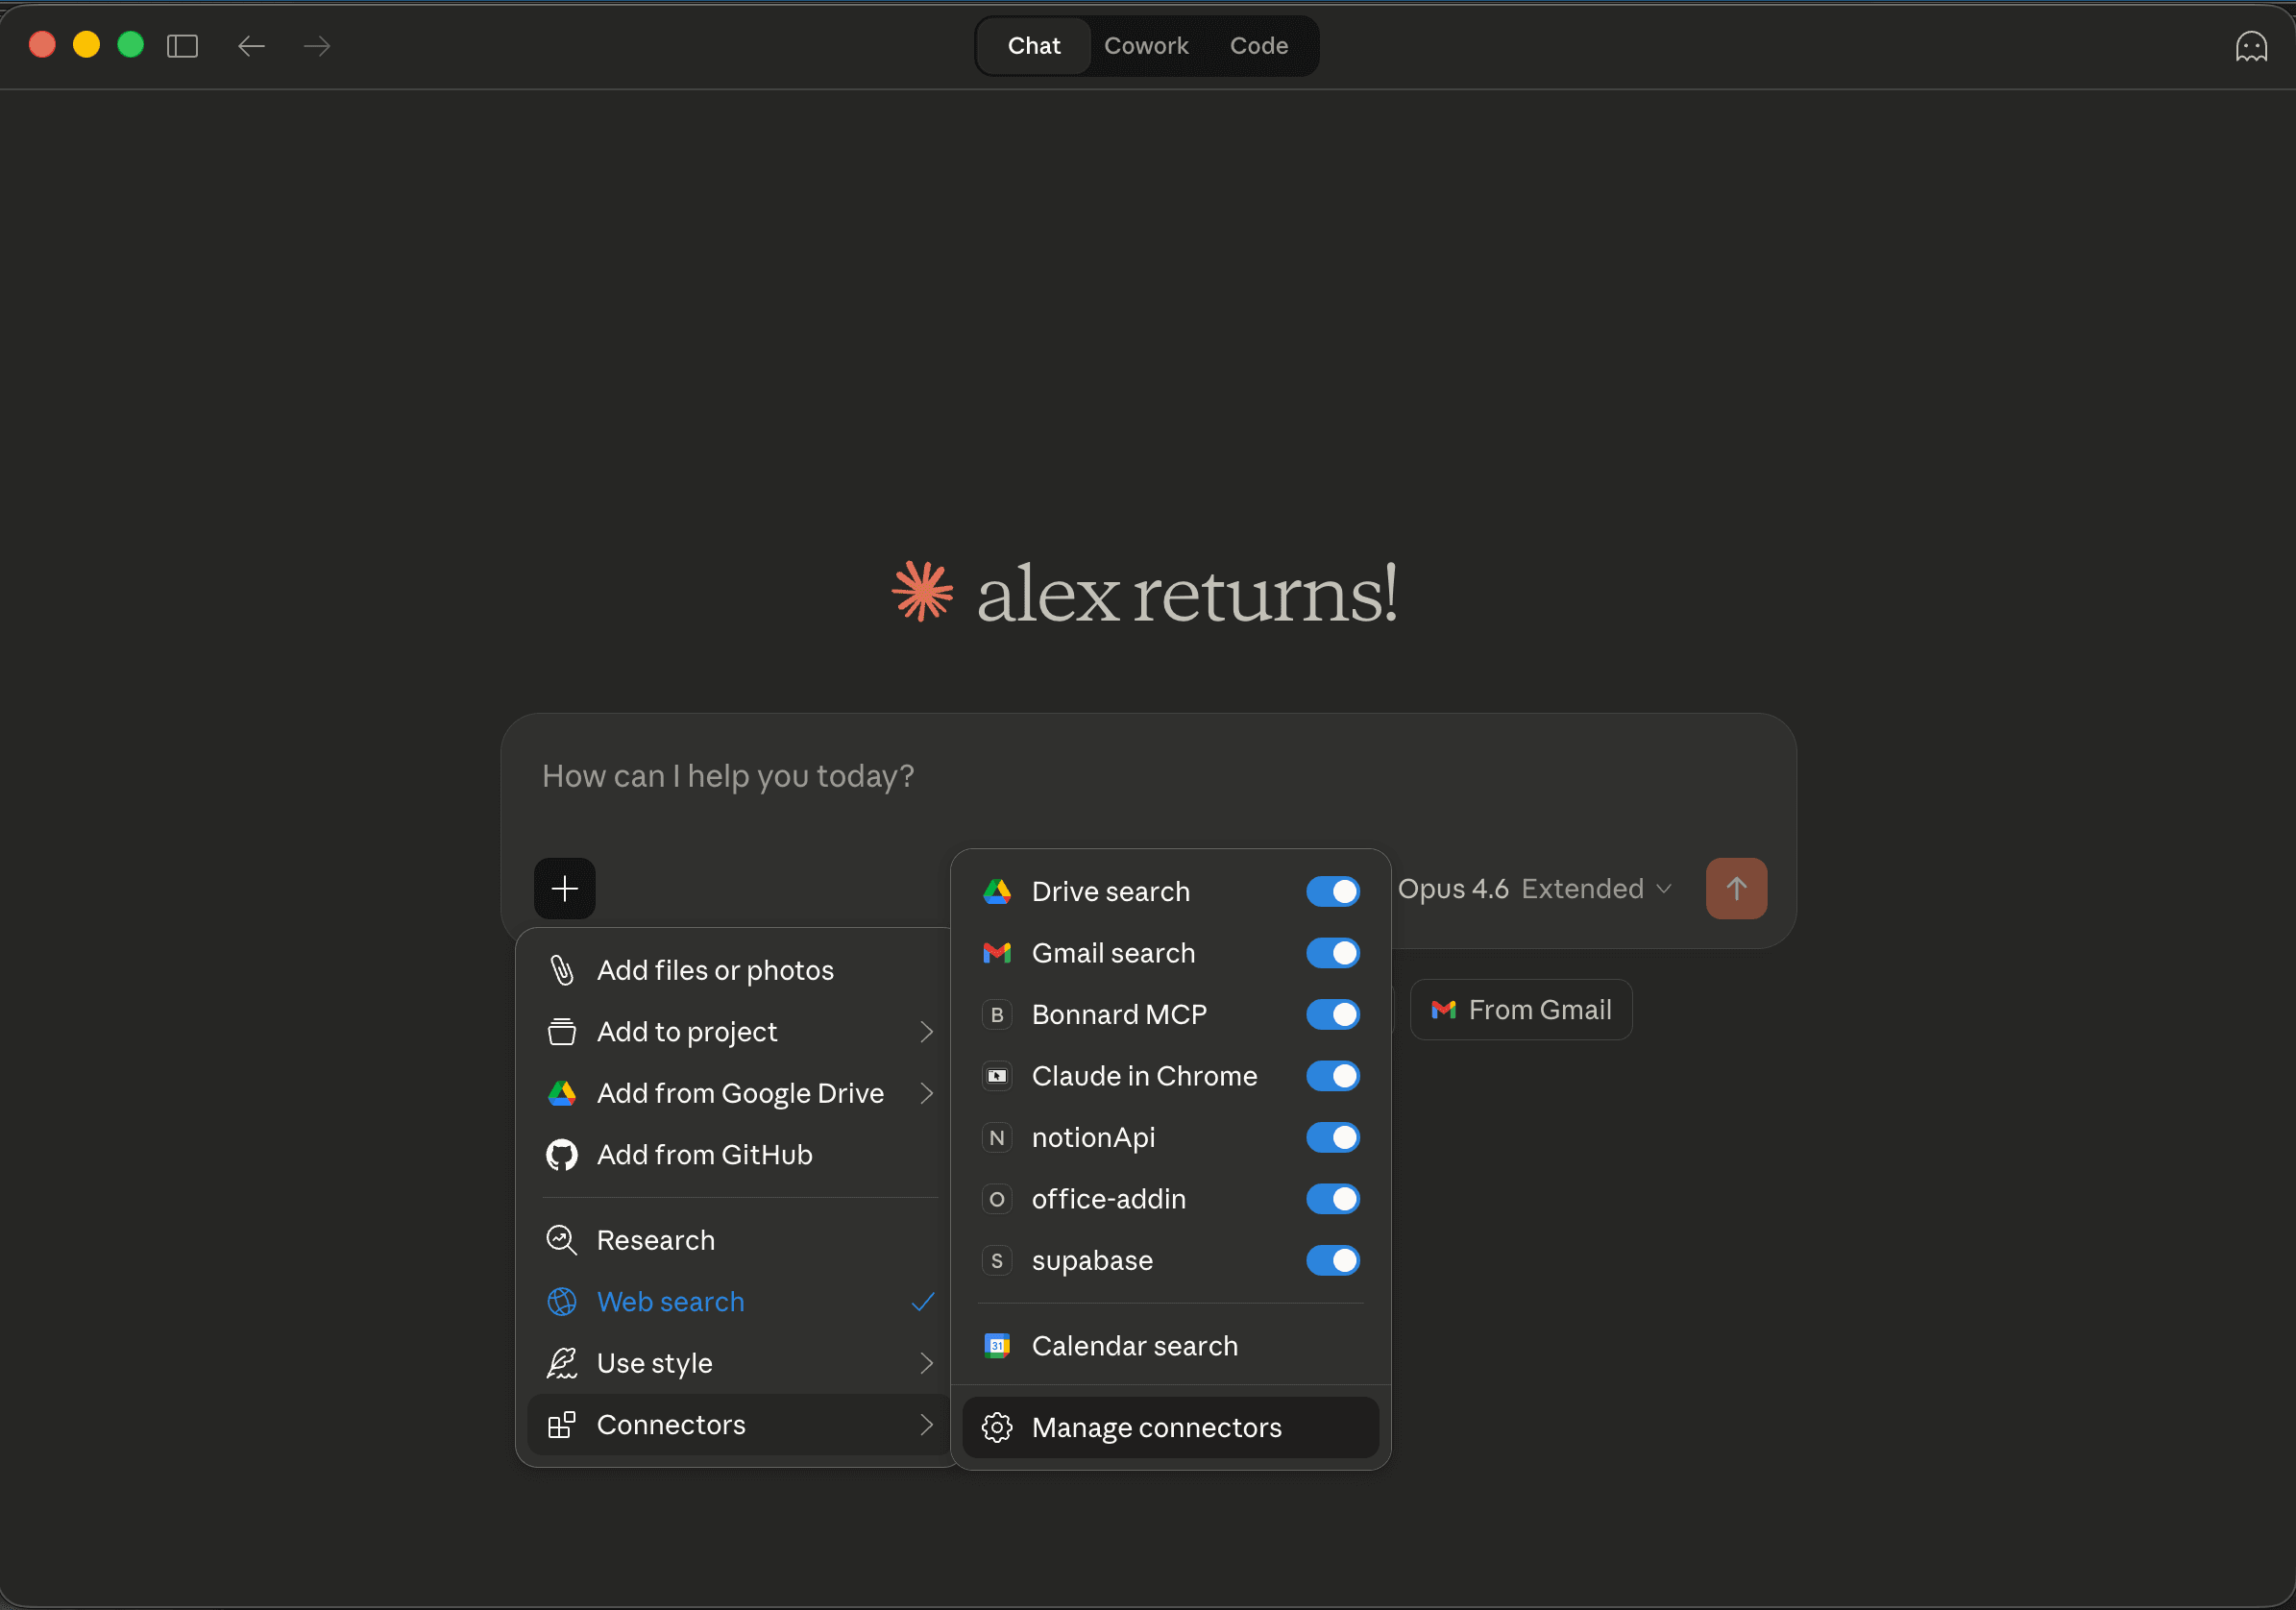
Remote MCP servers in Claude Desktop must be added through the Connectors UI, not the JSON config file.
ChatGPT
- Open Settings > Apps
- Click Advanced settings and enable Developer mode
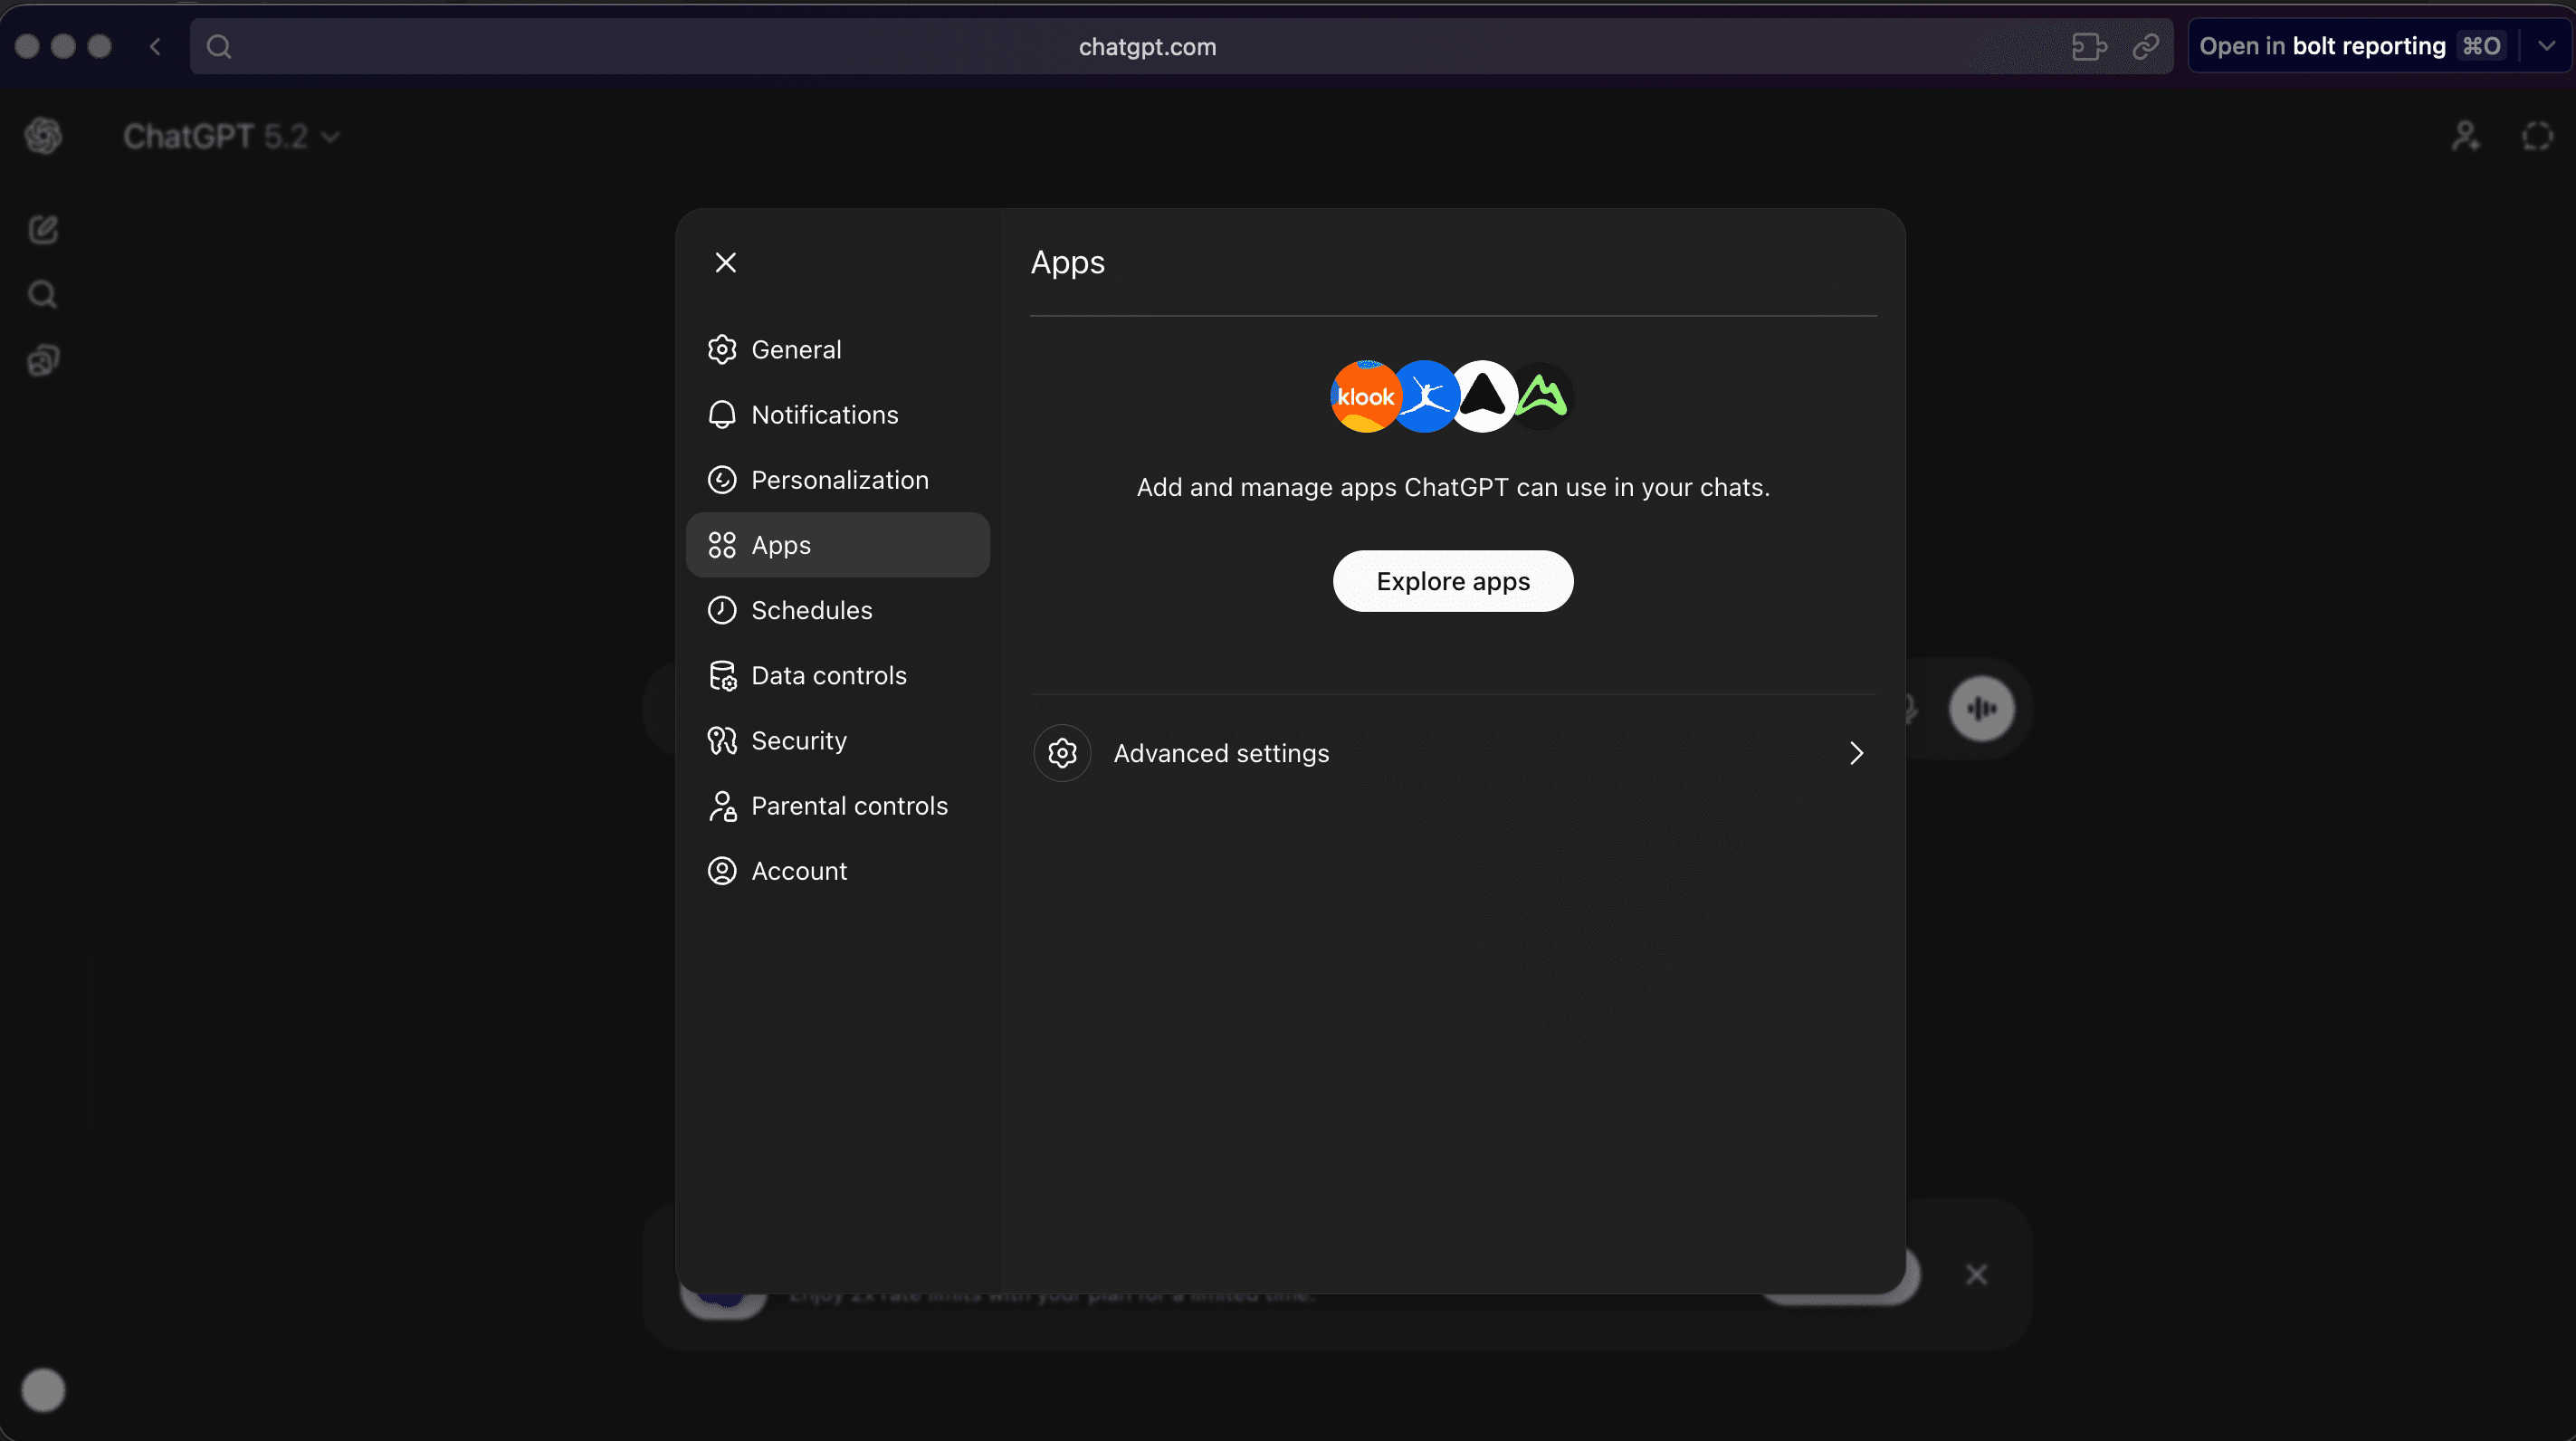
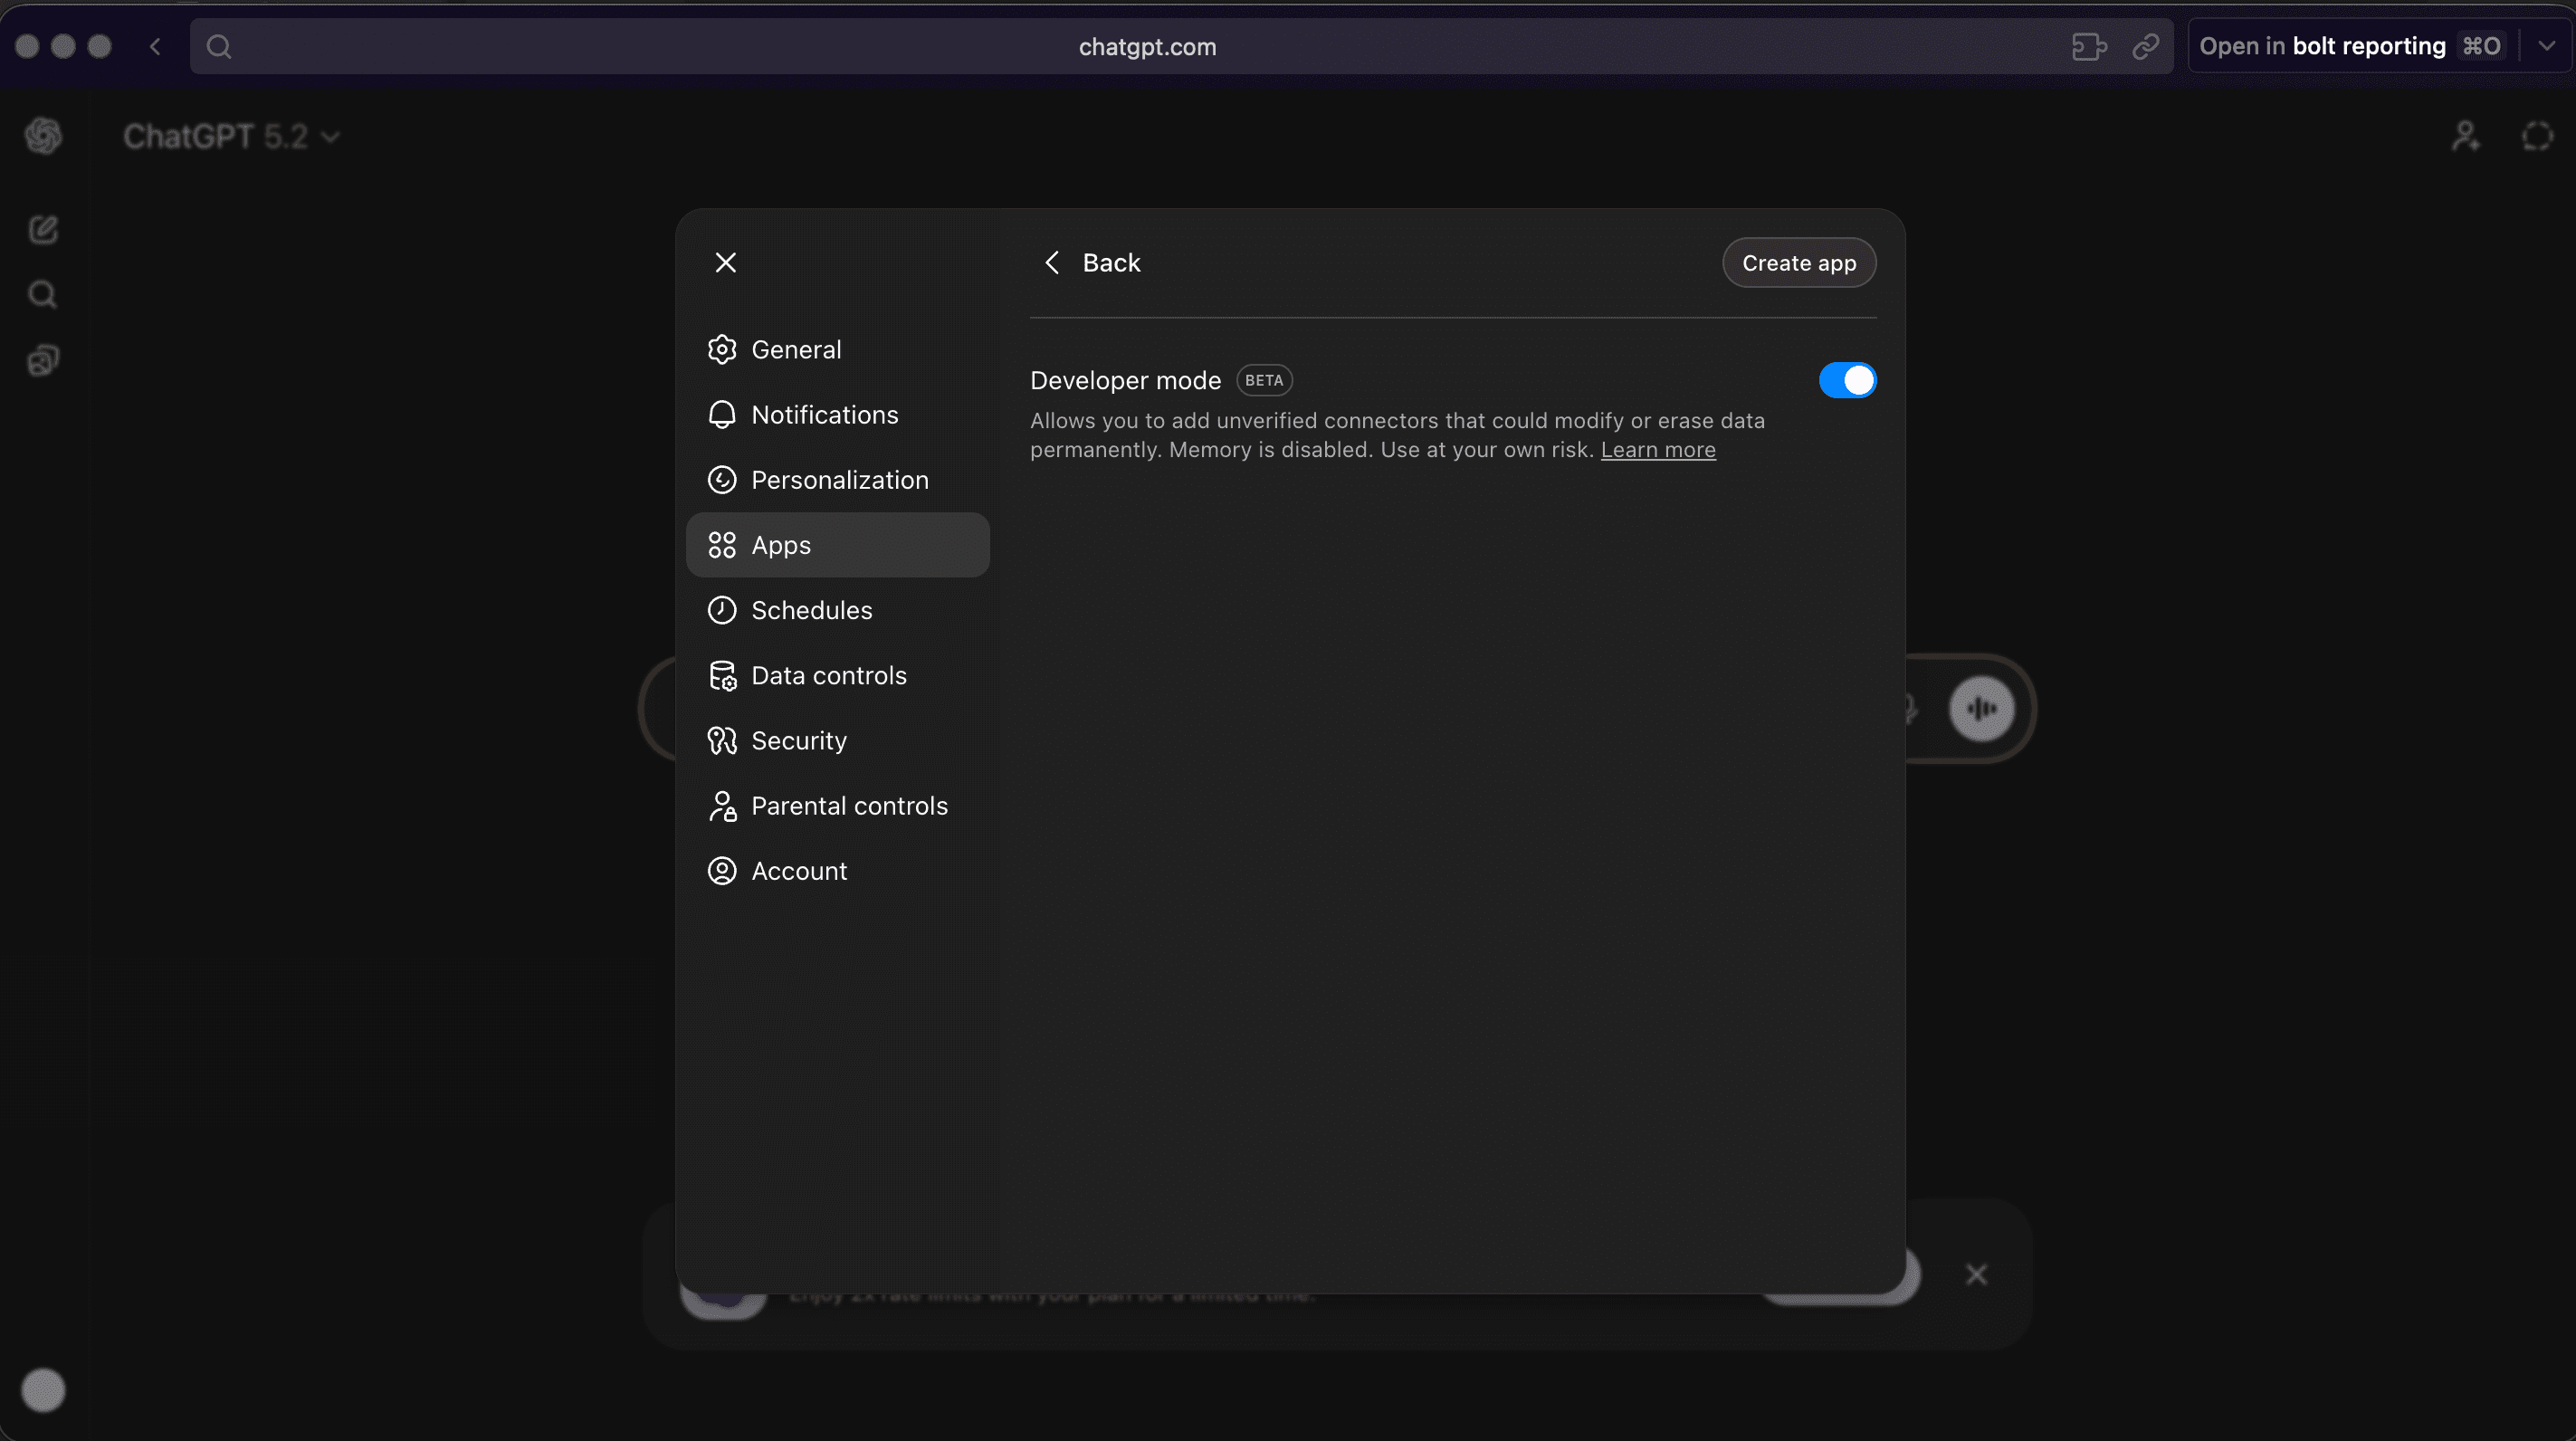
- Click Create app
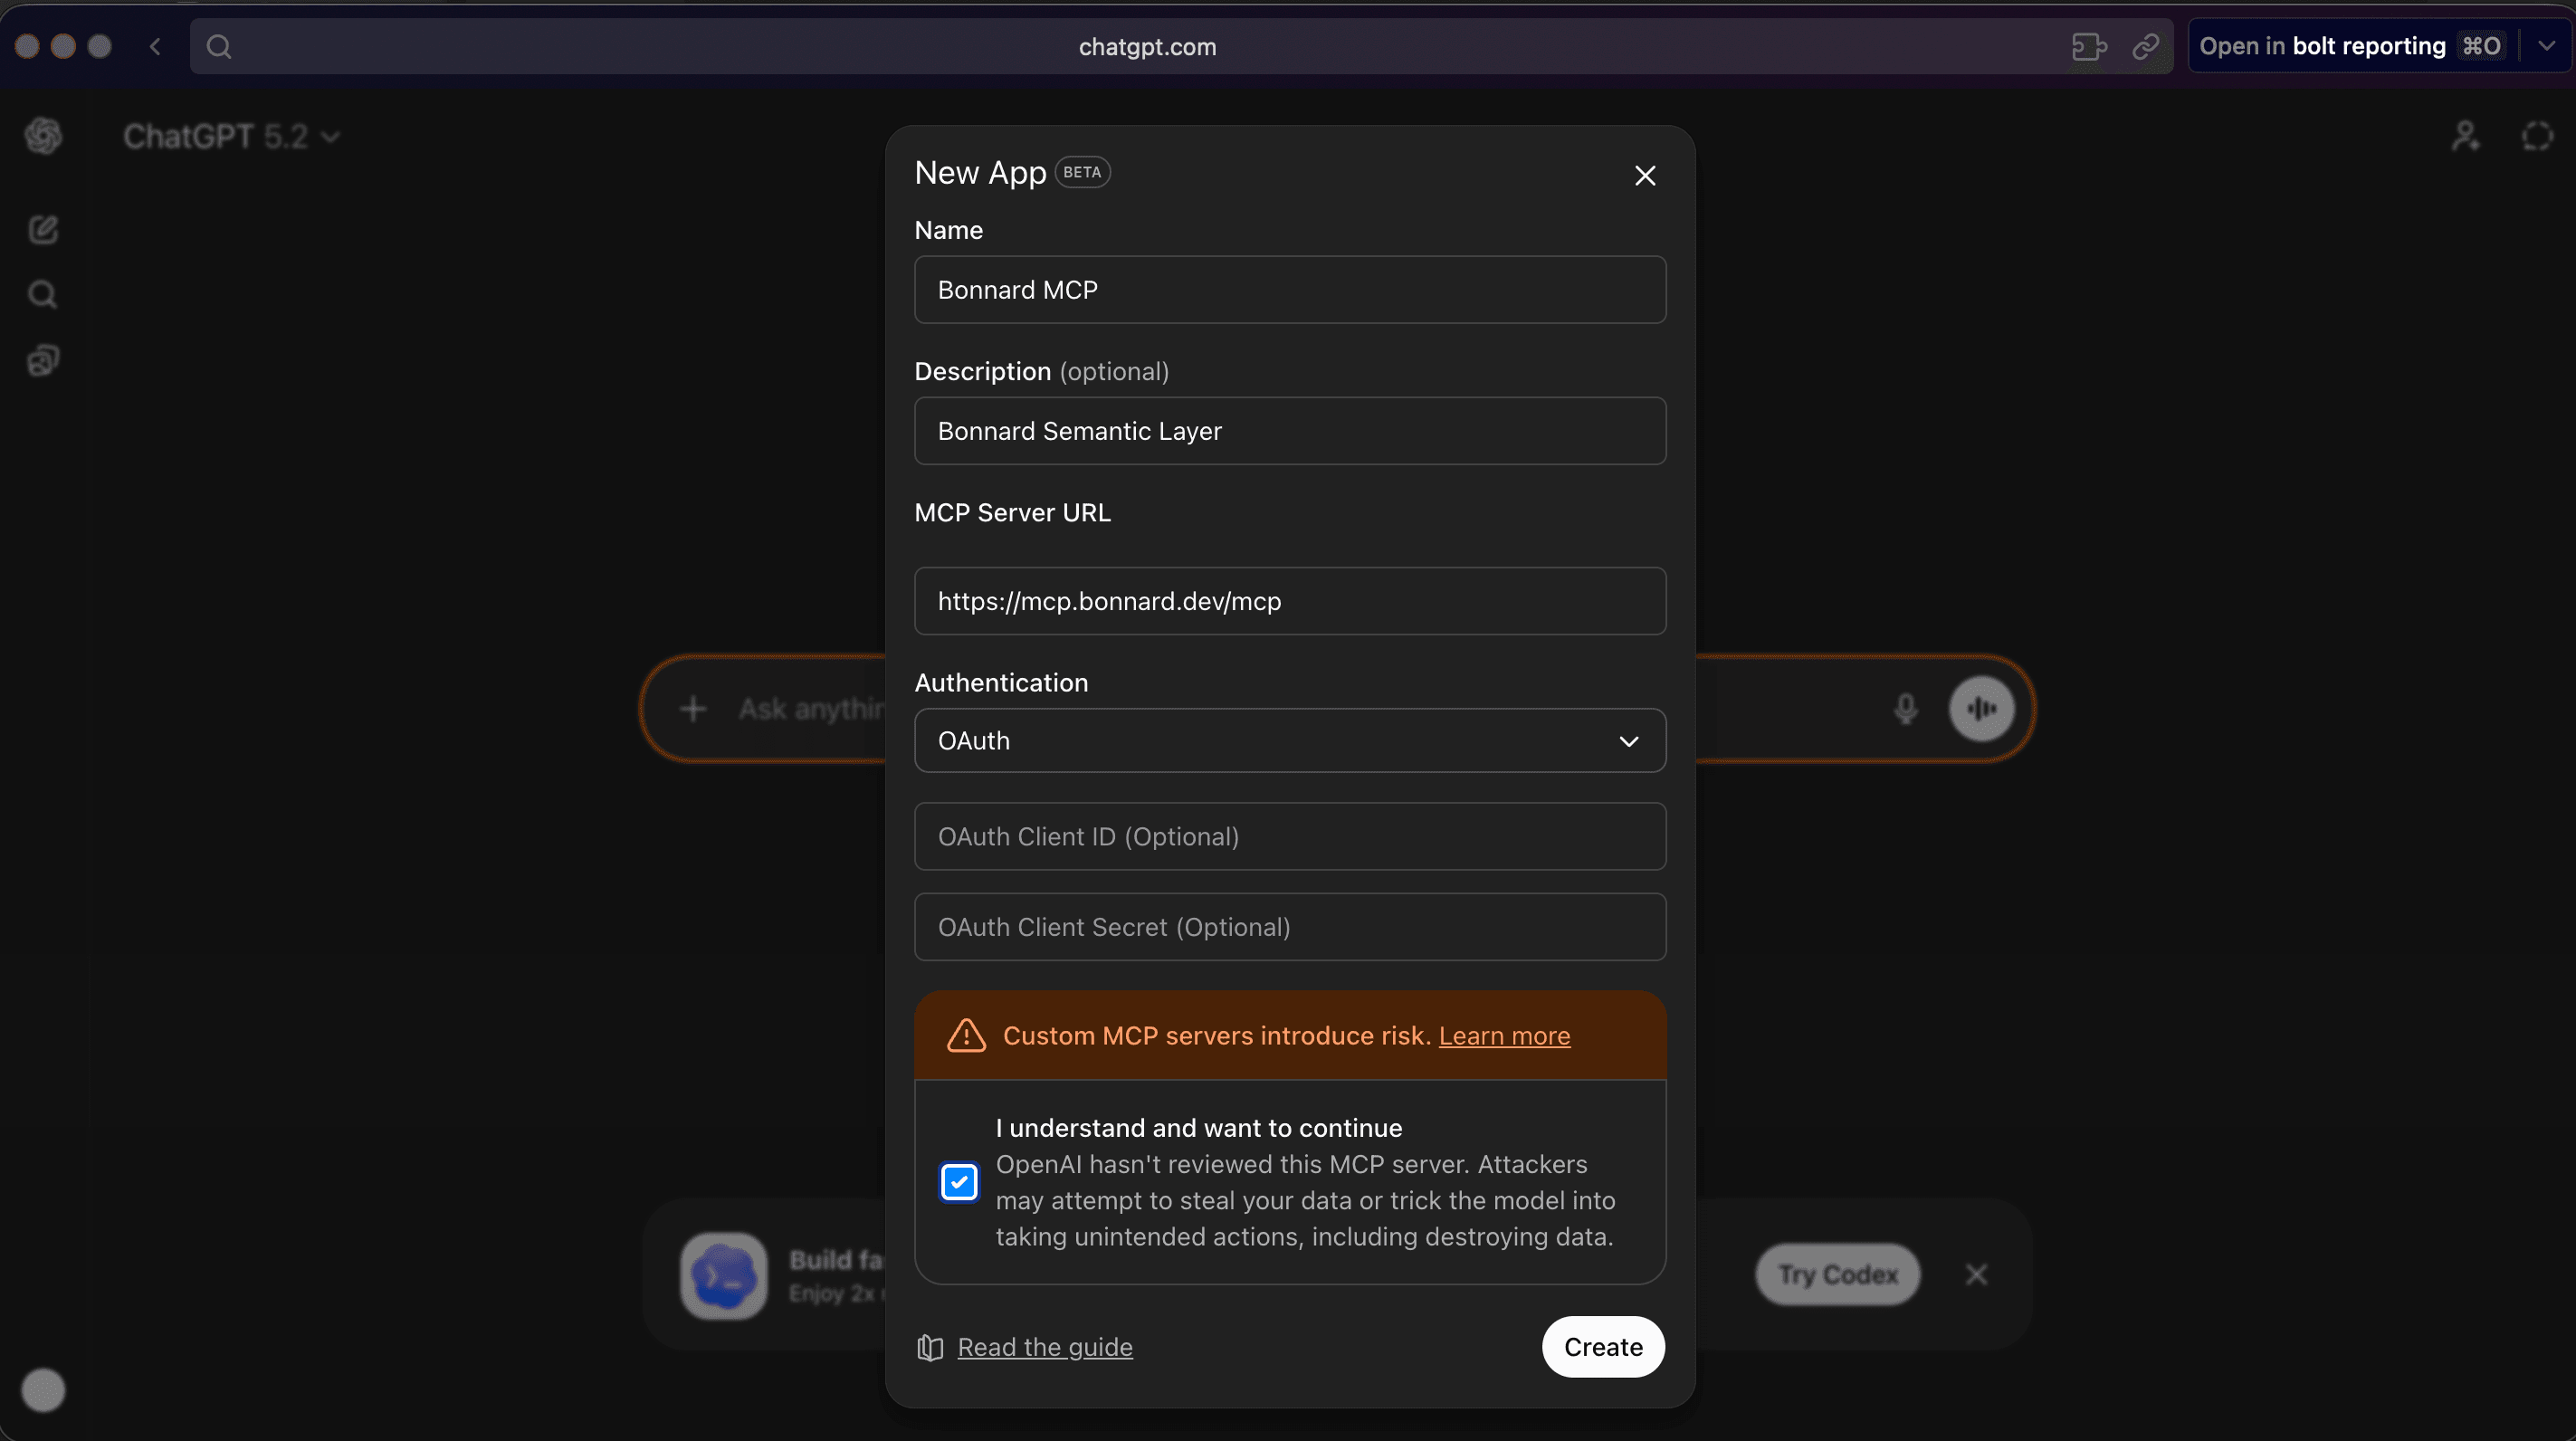
- Enter a name (e.g. "Bonnard MCP"), the MCP URL
https://mcp.bonnard.dev/mcp, and select OAuth for authentication - Check the acknowledgement box and click Create
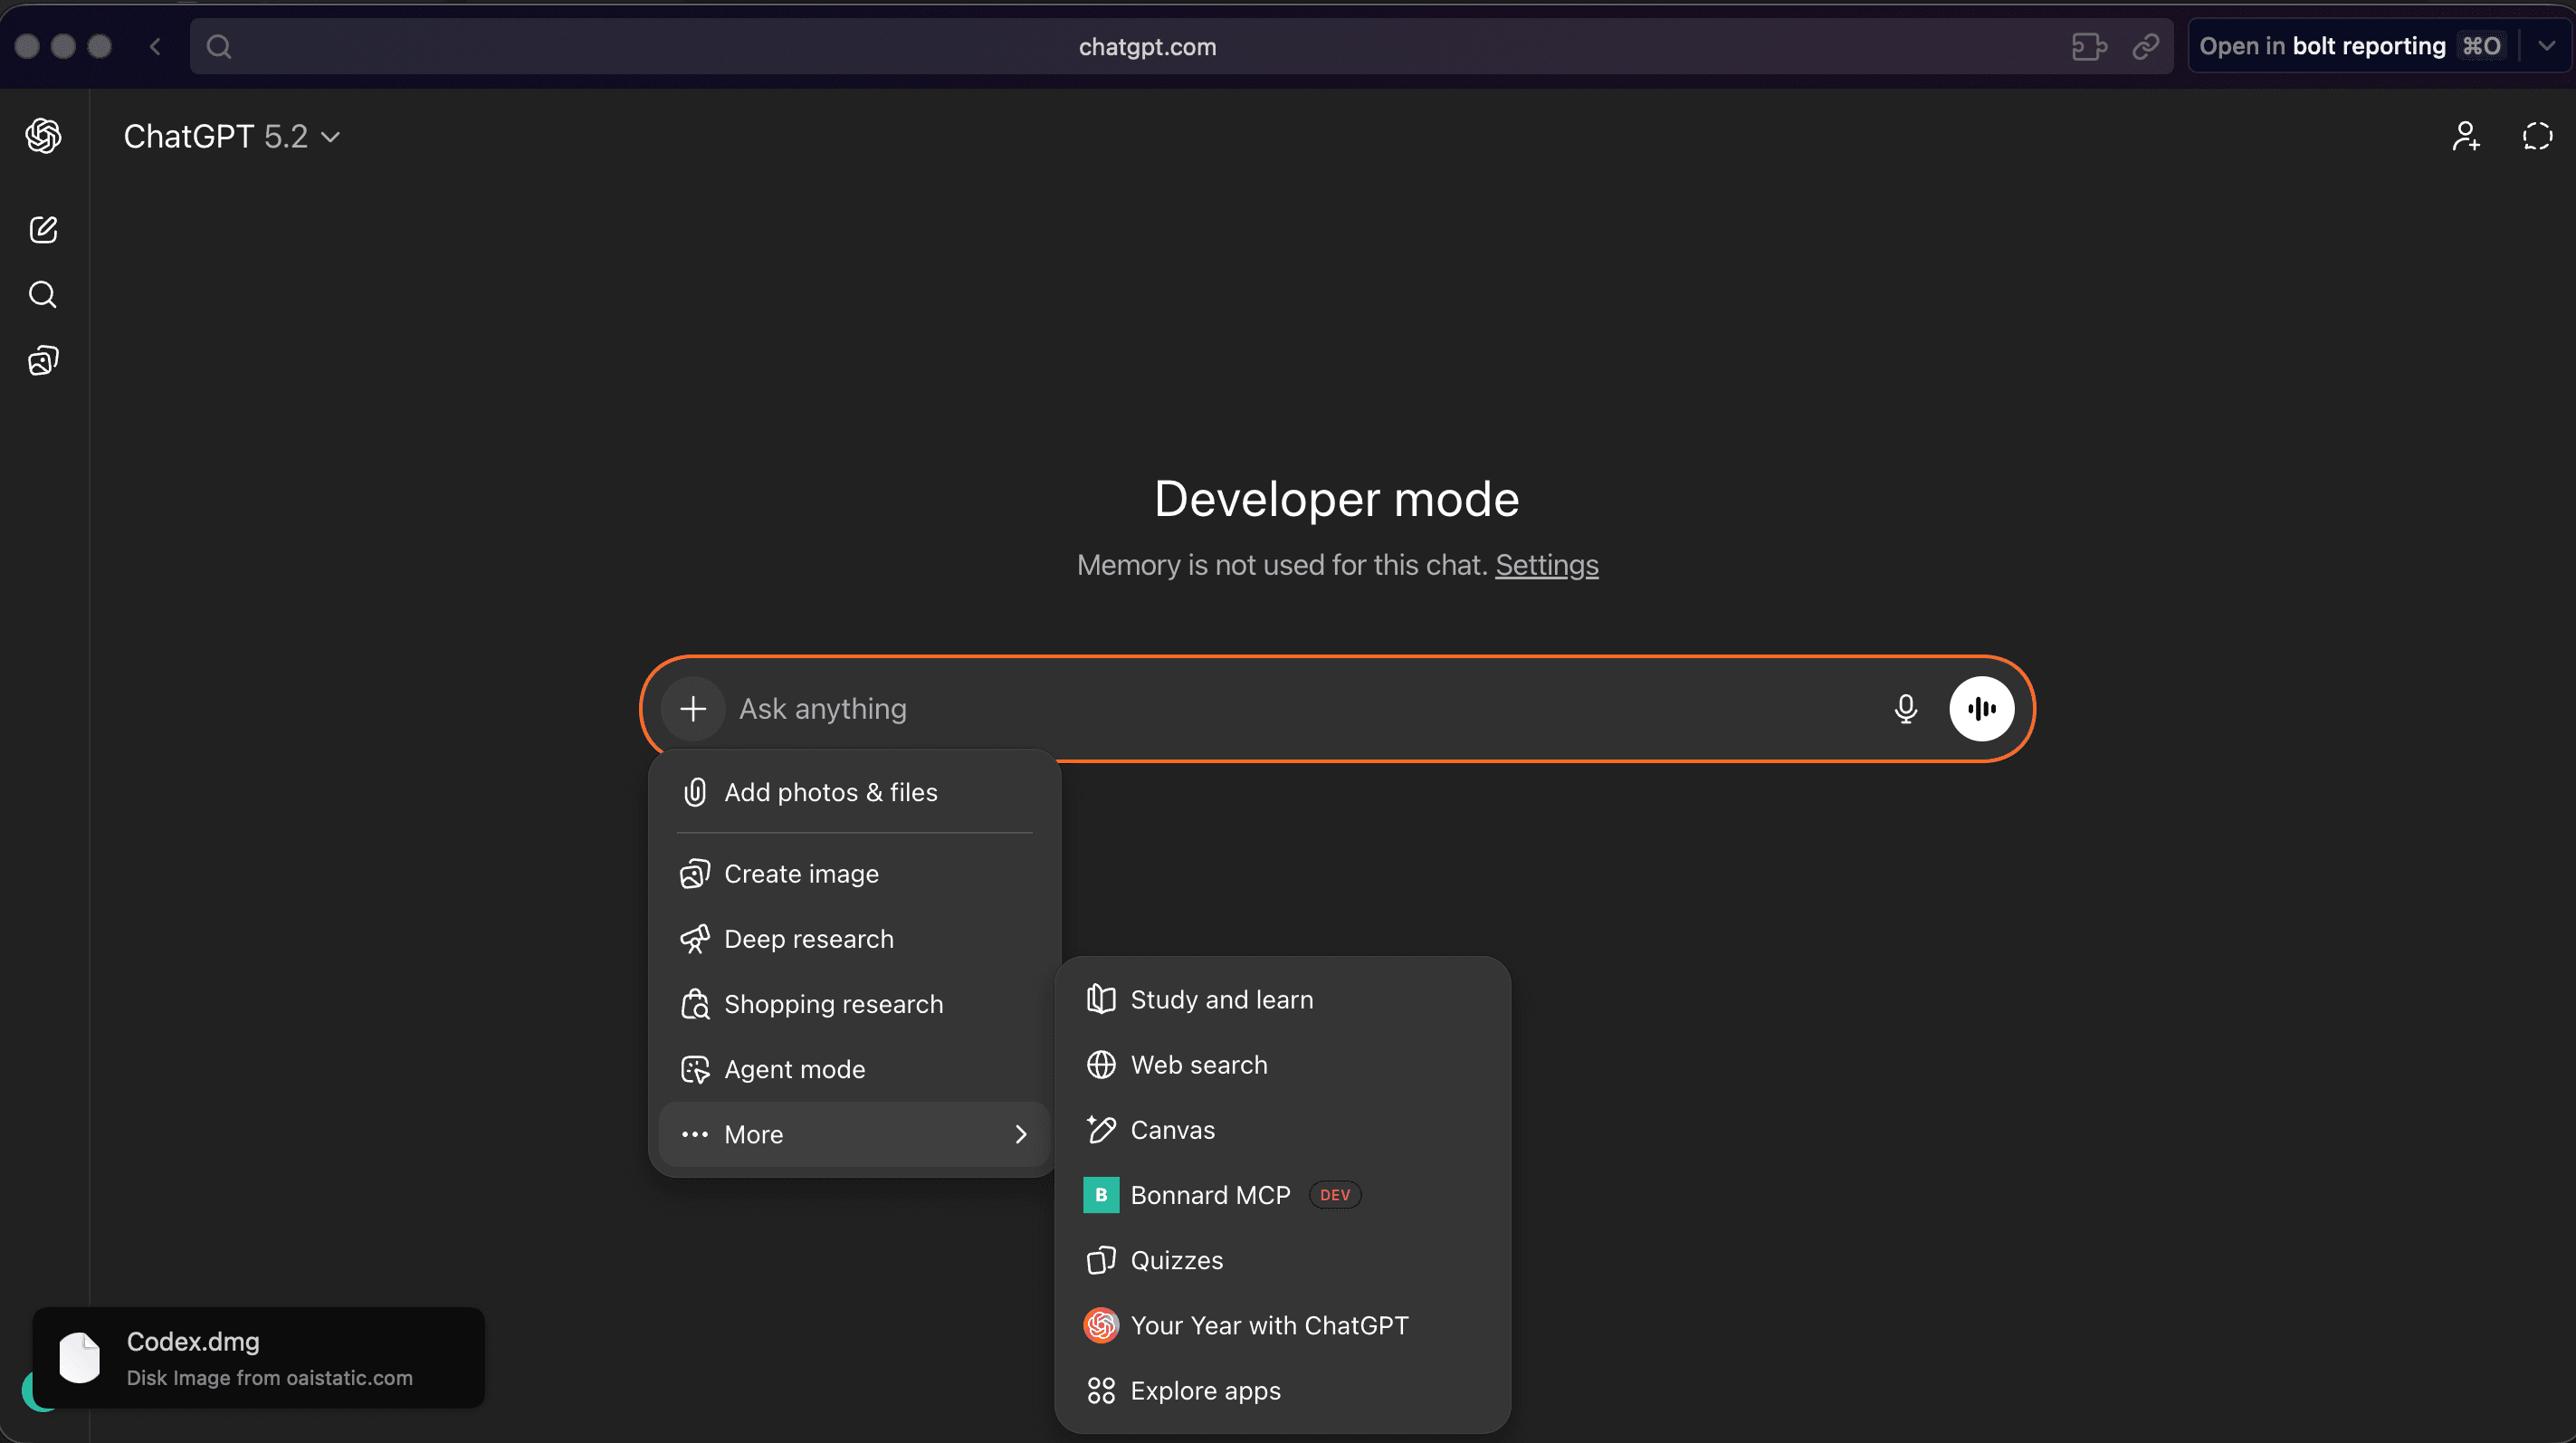
Once created, the Bonnard connector appears in the More menu in any chat:
Available on Pro and Plus plans.
Cursor
Open Settings > MCP and add the server URL, or add to .cursor/mcp.json in your project:
\{
  "mcpServers": \{
    "bonnard": \{
      "url": "https://mcp.bonnard.dev/mcp"
    \}
  \}
\}
VS Code / GitHub Copilot
Open the Command Palette and run MCP: Add Server, or add to .vscode/mcp.json in your project:
\{
  "servers": \{
    "bonnard": \{
      "type": "http",
      "url": "https://mcp.bonnard.dev/mcp"
    \}
  \}
\}
Claude Code
Run in your terminal:
claude mcp add --transport http bonnard https://mcp.bonnard.dev/mcpOr add to .mcp.json in your project:
\{
  "mcpServers": \{
    "bonnard": \{
      "type": "http",
      "url": "https://mcp.bonnard.dev/mcp"
    \}
  \}
\}
Windsurf
Open Settings > Plugins > Manage plugins > View raw config, or edit ~/.codeium/windsurf/mcp_config.json:
\{
  "mcpServers": \{
    "bonnard": \{
      "serverUrl": "https://mcp.bonnard.dev/mcp"
    \}
  \}
\}
Gemini CLI
Add to .gemini/settings.json in your project or ~/.gemini/settings.json globally:
\{
  "mcpServers": \{
    "bonnard": \{
      "url": "https://mcp.bonnard.dev/mcp"
    \}
  \}
\}
Authentication
MCP uses OAuth 2.0 with PKCE. When an agent first connects:
- Agent discovers OAuth endpoints automatically
- You are redirected to Bonnard to sign in and authorize
- Agent receives an access token (valid for 30 days)
No API keys or manual token management needed.
Available Tools
Once connected, AI agents can use these MCP tools:
| Tool | Description |
|---|---|
explore_schema | Discover views and cubes, list their measures, dimensions, and segments. Supports browsing a specific source by name or searching across all fields by keyword. |
query | Query the semantic layer with measures, dimensions, time dimensions, filters, segments, and pagination. |
sql_query | Execute raw SQL against the semantic layer using Cube SQL syntax with MEASURE() for aggregations. Use for CTEs, UNIONs, and custom calculations. |
describe_field | Get detailed metadata for a field — SQL expression, type, format, origin cube, and referenced fields. |
Testing
# Verify the MCP server is reachable
bon mcp test

# View connection info
bon mcp
Managing Connections
Active MCP connections can be viewed and revoked in the Bonnard dashboard under MCP.
See Also
- workflow.deploy
- workflow.query